Tables
Tables allow for the presentation of relationships between data in a structured format using rows and columns. When data is organized in a table, simplicity can help with clarity. For complex tables, dividing them into several smaller tables and adding headings may improve readability.
IMPORTANT NOTE: Tables should not be used to control layout. Authoring tools have other options available for arranging content, including organizing content into columns.
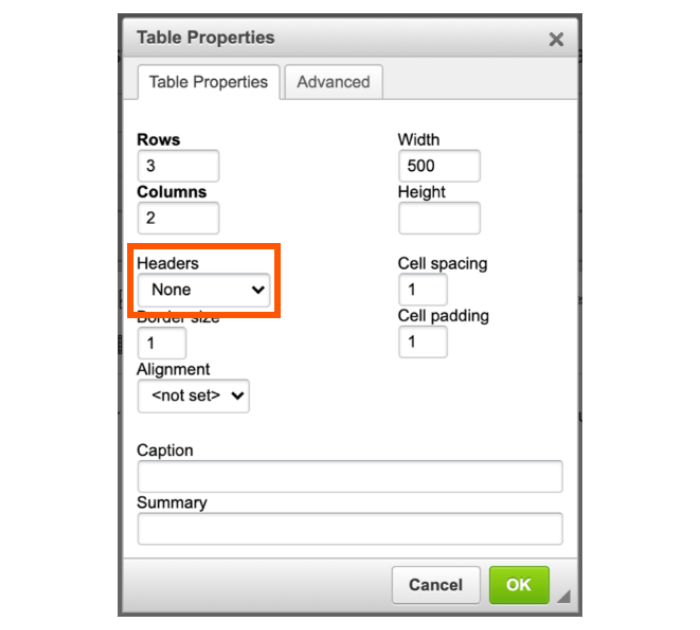
A key to making data tables accessible to screen reader users is to clearly identify column and row headers.
Techniques
Microsoft Word has certain limitations regarding table accessibility. While it is suitable for basic tables featuring a single row of column headers without any nested rows or columns, more complex table structures require alternative formats. Such tables can only be rendered fully accessible using HTML or Adobe PDF, with the latter requiring accessible table markup to be applied through Adobe Acrobat Pro.
Frequently, intricate tables may be made more accessible by dividing them into several straightforward tables, each accompanied by a descriptive heading.
To make simple tables accessible, it is necessary to specify which row contains the column headers. There is more than one way to identify a header row in a table, as illustrated by these two examples:
Option 1
Place your cursor in one of the cells of the header row, right-click, and then select “Table Properties” from the pop-up menu. In the Table Properties dialog box, click the Row tab at the top, and select the checkbox for the option to “Repeat as header row at the top of each page.” With this option selected, screen readers can identify the header rows for long tables that span multiple printed pages.

Option 2
In Word, when a table is added to a document, two new tabs (Table Design and Table Layout) will appear in the ribbon. After selecting the “Table Design” (or “Design”) tab, the header row can be defined in the Table Style Options group in the ribbon.

Microsoft provides the following support pages with additional information for creating accessible tables in Word:
For tables to be accessible on a Canvas page, follow the steps below.
Step 1: Identify Header Row
- From the Canvas page editor, select the table to edit.
- From the Rich Content Editor menu bar, select Table > Row > Row Properties.
- In the Row Properties dialog box, select "Header" as the Row type.
- Choose Save.
NOTE: The above steps give the effect of wrapping the header row in a <tbody> element in HTML.


Step 2. Identify Individual Header Cells
- From the Canvas page editor, select a column header or row header.
- From the Rich Content Editor menu bar, select Table > Cell > Cell Properties.
- In the Cell Properties dialog box, select “Header cell” as the Cell type.
- In the same dialog, select “Column” or “Row” as the Scope. If the header cell spans multiple rows or columns, select the appropriate option: “Column Group” or “Row Group”.
- Choose Save.
NOTE: The above steps give the effect of tagging the table cell as a <th> element in HTML with a scope attribute.


Some rich content editors provide a toolbar button for inserting tables. When this function is available, the editor may or may not include features that support accessibility for screen reader users, such as identifying table header cells.
When a rich content editor cannot add tables or specify column or row headers through its toolbar, editing the HTML code is necessary.
Simple Table
A simple table has a single header at the top of each column and a single header in the first column of each row. It has no nested columns or rows. To make a simple table accessible, apply the following techniques:
- Markup all column headers or row headers as table headers using the <th> element.
- Define the scope of each <th> using the scope attribute (the value of scope can be either “col” or “row”)
Complex Table
A complex table is not a simple table by definition and may include tables with nested rows or columns, or headers positioned somewhere other than the first row or column. Complex tables can present difficulties for screen reader users. When possible, consider organizing information into several simple tables, each with appropriate HTML headings. If a complex table is necessary, it may require additional markup to support accessibility for screen reader users.
- Markup all column headers or row headers as table headers using the <th> element.
- Add a unique id attribute to each <th> element.
- For every table data cell (<td>), add a headers attribute that lists the id’s of all headers that apply to that particular cell. Separate id’s with a space when more than one header applies to a cell.
Interactive Tables (or Grids)
If table cells include interactive elements like pop-up menus or form fields, they are classified as “grids” and must meet additional considerations for accessibility, such as using Accessible Rich Internet Applications (ARIA) markup.
WCAG 2.1 Success Criteria
The issues described on this page map to the following success criteria in the W3C’s Web Content Accessibility Guidelines (WCAG) 2.1:
- 1.3.1 Info and Relationships (Level A)


